Bootstrap Checkbox Field
Introduction
Once in a while the simplest aspects might just become pretty important-- specifically in case you come to need them. As an example just how do your site visitors communicate with the pages you set up stating a simple Boolean act-- just yes or no concerning some of the questions you require to request, precisely how they do approve the conditions and terms or line up a handful of the practical selections they might have. We commonly surpass this without paying much of an interest to the component responsible for these sorts of actions yet the Bootstrap Checkbox Input is really a really critical component-- one our forms just can't in fact complete without.
In the latest fourth edition of the Bootstrap system we are provided with the
.form-check.form-check-label<div>.form-check.form-check-label<label><input>.form-check-inputThe best ways to use the Bootstrap checkbox:
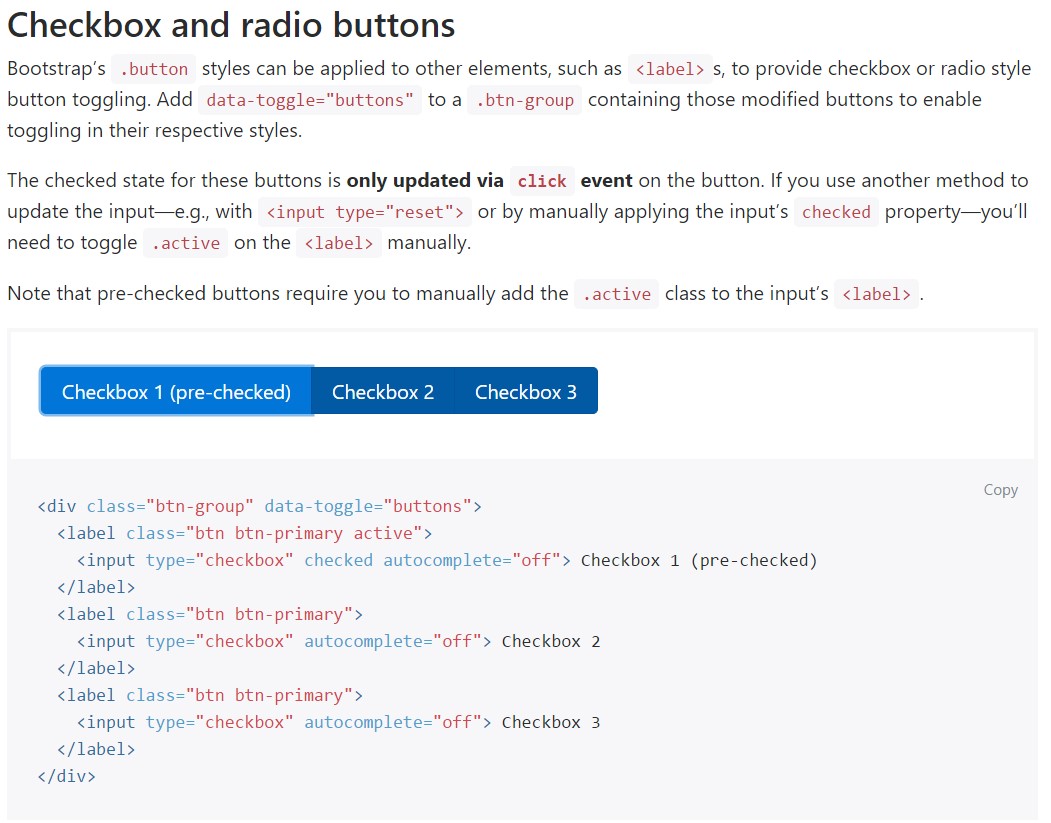
Bootstrap's
.button<label>data-toggle=" buttons".btn-group
<div class="btn-group" data-toggle="buttons">
  <label class="btn btn-primary active">
    <input type="checkbox" checked autocomplete="off"> Checkbox 1 (pre-checked)
  </label>
  <label class="btn btn-primary">
    <input type="checkbox" autocomplete="off"> Checkbox 2
  </label>
  <label class="btn btn-primary">
    <input type="checkbox" autocomplete="off"> Checkbox 3
  </label>
</div>
Once in a while we want the checkboxes to come in our forms without the site visitor truly having the ability to take any action clicking on them-- that is simply where exactly the disabled option comes in.
In order to disable correctly a checkbox in Bootstrap 4 using the common HTML attribute
disabledIn case you find appealing the suggestion and really really want to accomplish this you should designate the
.disabled.form-checkSome other situation
Whenever you are employing checkboxes, wrap them in a
<label>.custom-control.custom-checkboxEmploy
.custom-control-input<input>In addition work with two
<span>.custom-control-indicator.custom-control-description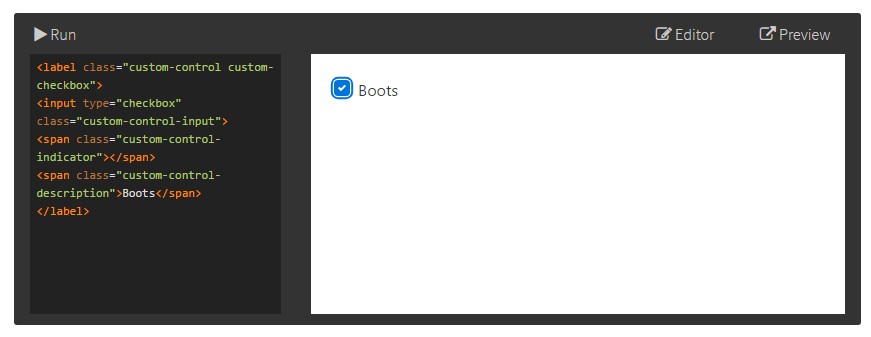
<label class="custom-control custom-checkbox">
<input type="checkbox" class="custom-control-input">
<span class="custom-control-indicator"></span>
<span class="custom-control-description">Boots</span>
</label>
Bootstrap Checkbox Design forms
Default radios and checkboxes are enhanced upon with the help of
.form-checkThe disabled class will at the same time lighten the message colour to help specify the input's state.
A fresh stuff for the Bootstrap version 4 framework is the launch of the so called custom-made form features. These are the same features we are knowing in usefulness though designated way more interesting and also with the Bootstrap way. Having them you have the ability to provide special spice and charm to your content by simply just selecting a couple of special classes to the commands you feature in your forms.
In order to apply custom checkboxes wrap them in a
<label>.custom-control.custom-checkbox<input>.custom-control-input<span>.custom-control-indicator.custom-control-descriptionConclusions
That's literally all you must handle in order to add a checkbox feature inside of your Bootstrap 4 powered websites and provide some custom flavor to it adding in it a quality looks. Now all you need to do is repeat the exercise until you've checked all the checkboxes needed are readily on the webpage.
Take a look at several youtube video training about Bootstrap checkbox
Related topics:
Bootstrap checkbox main records
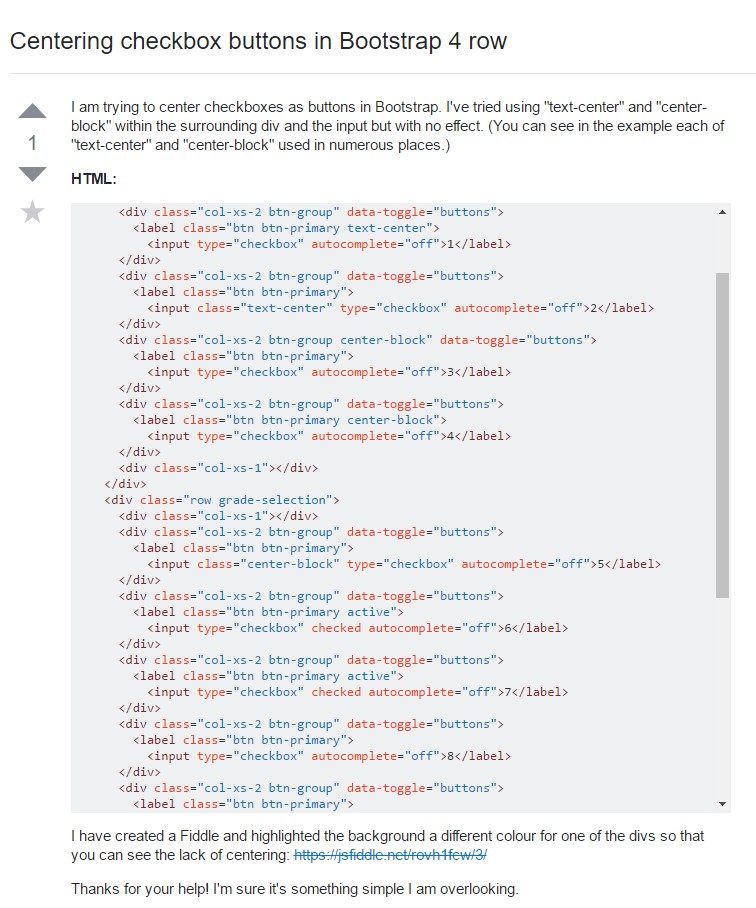
Centering checkbox buttons in Bootstrap 4 row
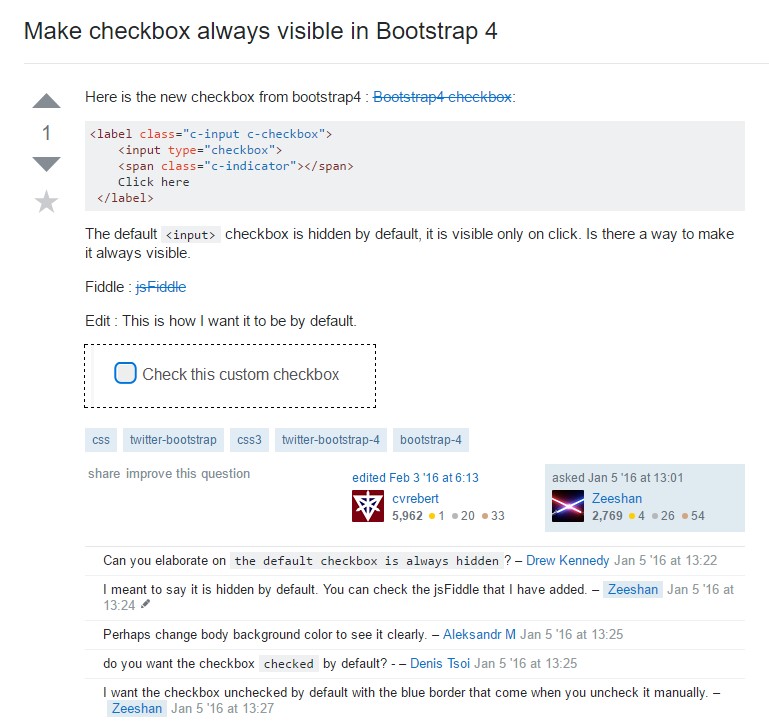
Make checkbox always visible in Bootstrap 4